»

Saturday, February 25, 2017

Please Excuse Our Dust...


Coming SOON!!  A brand new blog!


Thursday, June 9, 2016

Hey, Hey Kool Aid


Hey, hey KOOL AID!


Kool Aid hair, it's become a summer tradition in our house.  Towards the end of the school year, usually within the last week, my daughter dip dyes her hair using kool aid. We only dip the ends because it is PERMANENT and in the past if she wants all of the color gone by fall we've had to have it cut out.  This is the third year we've dip dyed her hair and we've learned a few things along the way.  Most important, like I said before, it is permanent.  It will fade, depending on different factors like the type of shampoo you use, swimming in chlorine pools, and the health of your hair.  For us it does not come out completely.   We dye it in mid June and always use red (cherry) kool aid because by early September, when school starts, it has faded to a pretty auburn in her medium brown hair and looks like a natural hair color.  Since my daughter's school dress code does not allow "unnatural" hair dye colors, the red is a perfect choice for us.  Kool Aid dip dye works GREAT on blondes, and works on lighter brunettes too.  If your hair is dark brown or black, the color will still take, but it will be more subtle.  We have a few friends that dip dye their hair too and have seen a few different colors and how they fade.  The red flavors seem to be the most consistent and dye the most evenly.  Blues really vary depending on your hair.  They usually color hair a light blue to a teal.  Blue will fade to a light blue, green or even gray.  I don't recommend using grape.  It usually colors hair a muddy brown, not purple.

Here's how we dip dye and what you'll need to dip dye your hair. 

4 packets of sugar free kool aid (we use cherry)
2 mugs or glasses
2-3 cups boiling water
2 hair elastics
paper towels
towels (ones you don't mind getting stained)
conditioner (optional)

We start with clean dry hair.  We like to let the color "set" for 48 hours, so starting with clean hair is important.  Divide hair into 2-4 sections, depending on length and thickness.  We divide hair into 2 low ponytails and dip both at the same time.   Put the elastic hair ties where you will dip the hair to.  Use it as your guide and don't dip the hair past the hair ties.  This will give you a more even line of color.  Boil 2-3 cups of water and divide it evenly between 2 cups or mugs.  Add 2 packets of kool aid (UNSWEETENED!!) to each cup of water and mix until all of the kool aid is dissolved.  Cover the surface your mugs will be on with old towels in case of any spillage (we dip outside so we don't have to worry about any spills!)


Get comfortable and either watch some tv, or read a book while you are dipping!  The longer you dip the hair, the brighter the color will be. (This year we actually dipped her hair twice since her face frame layers in the front didn't reach to the ends of her ponytails.  For the second dip we put her hair in side ponys and had her lean forward over the cups for 10 minutes.)  I reccommend dipping hair for 15-30 minutes.  10-15 minutes should give a nice tint and 30 minutes should give a darker/brighter color.  Once you are done dipping the hair, pull it out of the kool aid and using paper towels, squeeze the excess kool aid out of the hair.  Remove the hair ties and rinse the hair with cool water.  You can condition the hair too.  Once it is dry, if it's not as dark/bright as you'd like you can dip the hair again!


This was the first year we tried kool aid hair dye!  We both loved it and it quickly became a summer tradition!


Second year of dip dying.  Much longer hair and we dyed more than just the ends!!  By fall it had faded to a pretty auburn and created an ombre effect in her hair.


We've figured out that the better condition your hair is in, the LESS color it holds!  This year she had just had her hair cut before we dip dyed.  No split ends meant much more subtle color!

You'll smell like kool aid for a couple washes, and the color may bleed when it's wet too!  Last summer, my daughter's hair would bleed occasionally for about a month after dying it, without rhyme or reason.  I'd suggest not wearing a white or light collored shirt when your hair is wet for awhile after.


Monday, January 7, 2013

I've missed blogging, I really have!  So I think it's about time I get back to it.  Maybe some new tutorials, and lots new sneak peeks for the brand new year! 

Let's start off with a sneak peek at probably the most ambitious applique I've done so far!  I've held on to this image for well over a year and was recently asked by a friend to try to applique it.  I am thrilled with it and hope you love it too!!


Sunday, January 23, 2011

LaLa Love

Oh, how we love this little Lalaloopsy dolls! While the big dolls are a little top heavy, and are hard to play with, the mini's are just adorable and so much fun. Emily loves just about anything in minature, so the little mini dolls are perfect for her! A friend even made her a Crumbs Sugar Cookie purse as a Secret Santa present that she keeps all her mini dolls in.

This sweet little lounge set was my last set created in 2010!! What a perfect way to end the year. (Emily actually did end 2010 in this set - she wore it to bed New Year's Eve!!)

Photobucket

Photobucket

Photobucket

Photobucket

Watch for some new Lalaloopsy sets coming soon!! I have a Bea Spellsalot set that is just waiting for pictures!!!

Harry Potter Cuties!

Another fun set!! This one is Emily's all time favorites! She's even worn it to school a few times. This was made back in the fall for our Florida trip. We got to spend an evening at a private party at Universal Studios during our trip, and Emily got alot of attention in this set. We had so much fun at Wizarding World - I hope to go back soon so we can spend the whole day at universal instead of just a few hours.
Once it warms up her in frigid Michiga, we'll go outside and take some better pictures and I'll eventually liest this set.

Photobucket

Photobucket

Photobucket

My Poor Neglected Blog

So it's been awhile since I've posted to my blog! With the ease of posting on Facebook, I've forgotten to update here too. I'm going to try to get back into blogging and hope to post weekly - well, at least monthly.
2010 was a fun and busy year for us. Listings were a little scarce. I had quite a few custom orders, and I had my own Disney trip to sew for!!
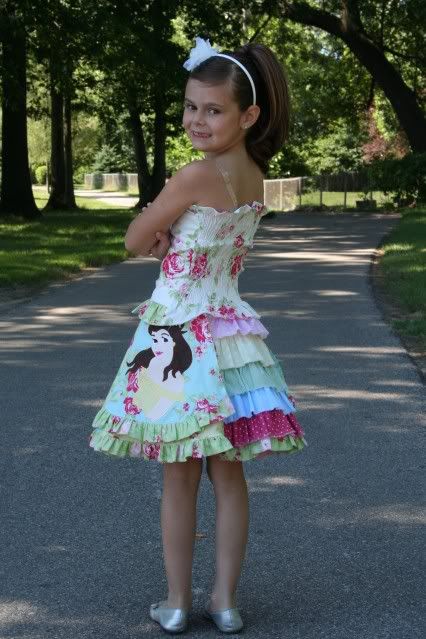
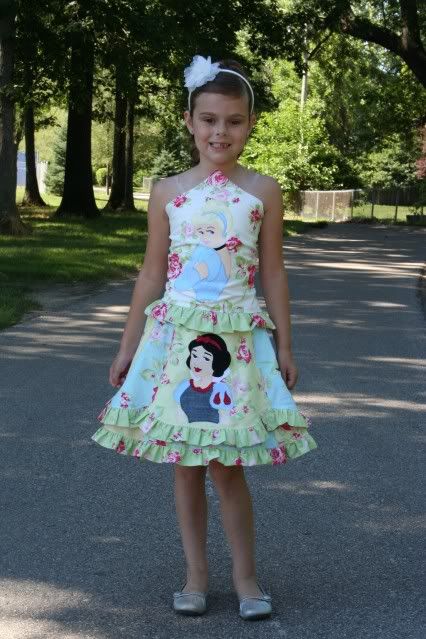
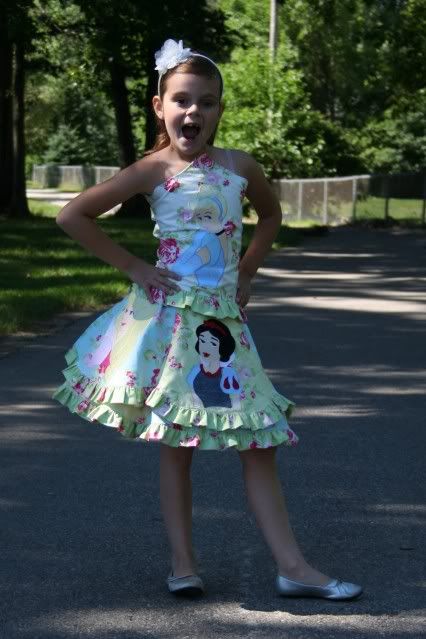
One of my favorite design of 2010 was my Princess set. I used some of my favorite shabby chic florals, paired them with some pastel polkadots, and added rows and rows of frayed ruffles!


Photobucket

Photobucket


Photobucket


Photobucket


One of my most requested sets has been the Peace, Love, Minnie
skirt set my daughter asked me to make. The design was actually a re-creation of a tee I had in the late 90's. Emily loves anything with a Peace sign on it, and even tweens like the denim skirt.

Photobucket

Photobucket

I've made some variations on the design and have made Peace, Love, Horses; Peace, Love, Texas; and even Peace, Love, American Girl!
My friend Marah was kind enough to send me some pictures that she had taken of her daughter's Peace, Love, Texas. Aren't the pictures stunning!!

Photobucket


Photobucket


Photobucket

It's been awhile since I've made somethng for my Little Man, but with our trip to Disney, he got lots of customs to wear too!! This one was made to math Big Sister's Peace, Love, Minnie set.

Photobucket

Photobucket

Photobucket


Tuesday, April 27, 2010

Jessie Loves Woody!

We can't wait for the latest Toy Story movie hits the Big Screen! Of course we needed a set to wear to the premiere, and this is perfect! I'll make a 4th of July tee later, and Emily can wear the skirt with that too! Nothing like Mix and Match pieces!
Of course Emily decided Chrissa needed a matching set too! She even found a little hat for her to wear ;)
Pictures were taken at The Westland Historical Village.


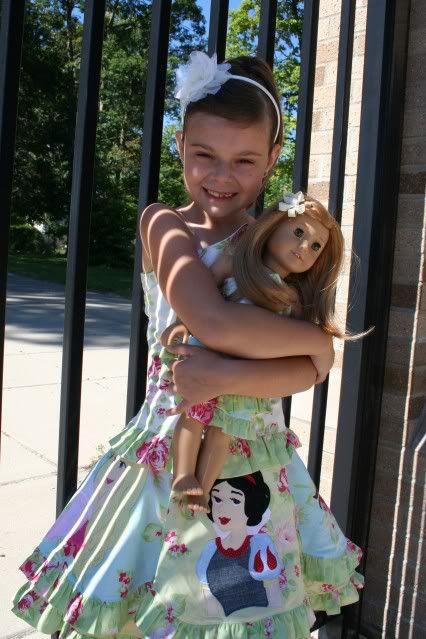
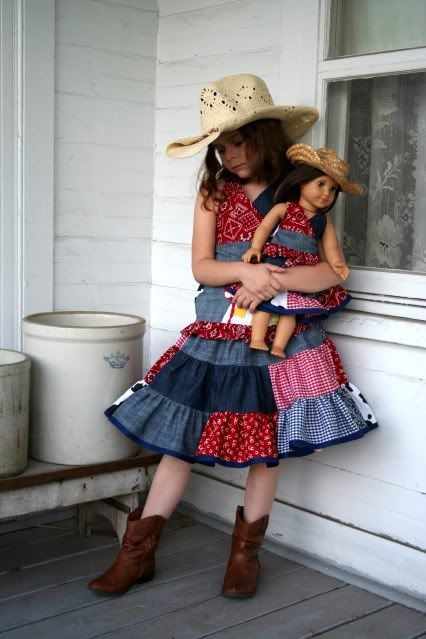
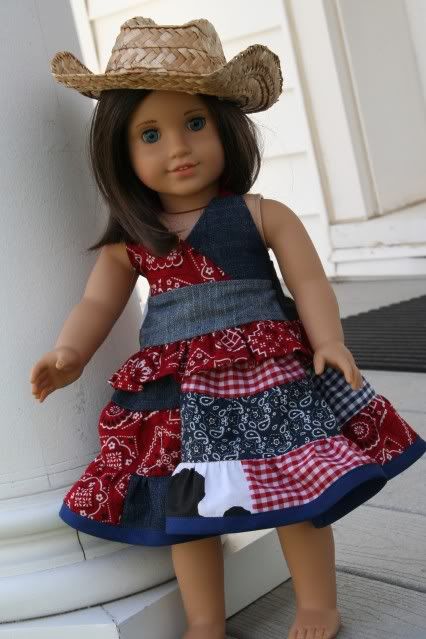
Can't forget about Chrissa!